Hosting Quick start Installing Joomla! for the first time is very easy. Joomla!'s built-in web installer makes setting up your new site a breeze.
Before we start installing Joomla!, there are a couple prerequisites that need to be met to install Joomla! successfully. These apply whether you have a dedicated server, a shared hosting plan, or are installing a copy on a local computer for testing or development. You'll need to meet the following requirements below to install and use Joomla! 3.x
 I. References Downloading and Uploading Joomla! Package Files
- Download the current release of Joomla! 3.0.x
- Create a database for use with Joomla! You will need to note basic database information needed when the actual Joomla! installation is started.
- Location of datase, localhost? Or a specific host's server such as
dbserver1.yourhost.com
- The database name
- The database user's name
- The database user's password
- Move the downloaded Joomla! installation package to the server. Use a FTP Client to transfer the Joomla! 3.0 files to your server. If you don't already have an FTP client, we recommend Filezilla
- Hint - This can be accomplished by simply moving the downloaded package to your server, then unpacking it. Or you can unpack the files on your local computer, then move the Joomla installation over to your server. Either way, the Joomla installation needs to be unpacked in the root of your site.
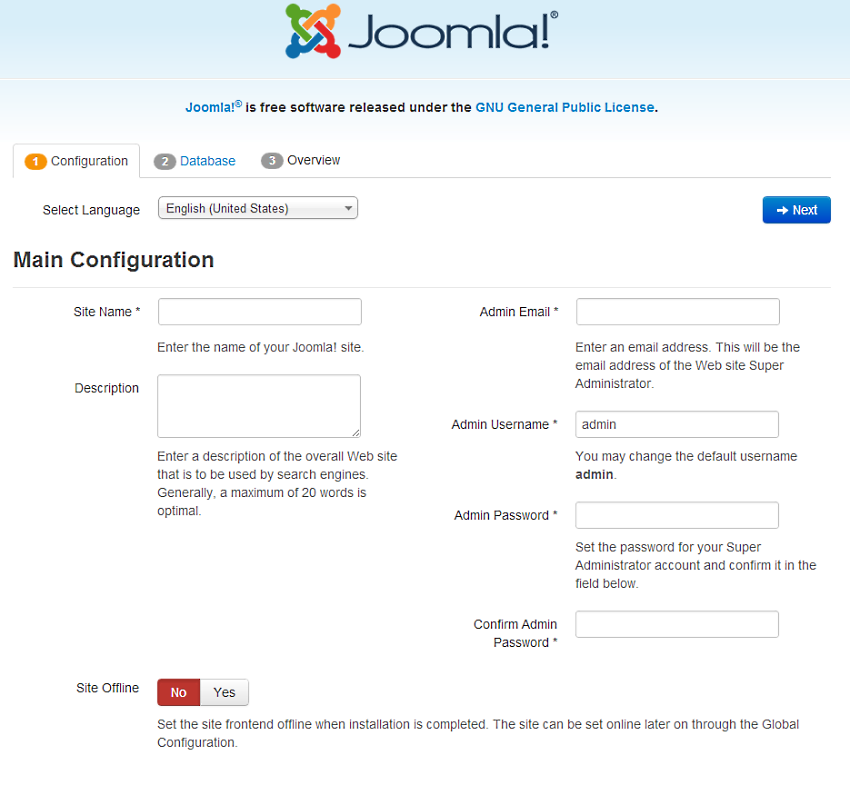
II. Main Configuration With the above requirements met, a database created and the required Joomla! files in place, you are ready to install Joomla!. Start the Joomla! web installer by browsing to the site's domain name,
www.yoursitename.com and you should see:
Joomla! will try to identify the
Select Languagefield automatically from your browser's language. You can change this if needed. Fill in the following information.
- Site Name: The name of your website — this can be changed at any point later in the Site Global Configuration page.
- Description: Enter a description of the website. This is a the global fallback meta description used on every page which will be used by search engines. Generally, a maximum of 20 to 25 words is optimal. Again, this can be changed on the Site Global Configuration page at any time. For more on metadata, see Global Metadata Settings and Entering search engine meta-data.
- Admin Email Address: The admin email address. Enter a valid email in case you forget your password. This is the email address where you'll receive a link to change the admin password.
- Admin Username: Joomla! uses a default "admin" as the username for the Super User. You can leave it as is, change it now(which a good Security measure) or use My Profile in the Administration interface to change it later.
- Admin Password: Remember that super user has maximum control of the site (frontend & backend), so try to use a difficult password. Use My Profile in the Administration interface to change it later. Confirm the password in the Confirm Admin Password box.
- Site Offline: Click the Yes or No box. Yes - this means when installation is complete, your Joomla! website will display the 'Site is offline message' when you browse to
yoursitename.com to view the home page. No - this means the site is live when you browse to yoursitename.com to view the home page. You can use the Site Global Configuration in the Administration interface to change the Offline status at any time.
When everything on the first page is completed, click the
next button to proceed:
III. Database Configuration
You will need the information about the database which was suggested above to note.
For simplification, these intructions are a reference to installing with a
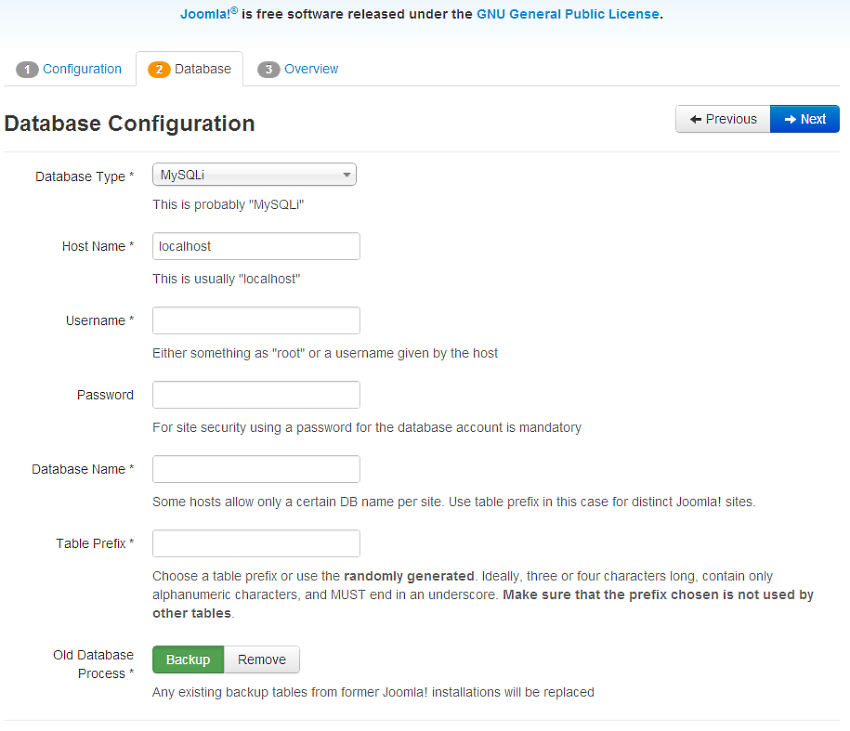
MySQLi database. The instructions on the installation page are self explanatory, but here they are again:
- Database Type: MySQLi is the common database used
- Hostname: Where is your database located? Common is
localhost, but some hosts use a specific database server such as dbserver1.yourhost.com
- Username: The username used to connect to the database
- Password: The password for the database's username
- Database Name: The name of the database
- Table Prefix: One is generated automatically, but you can change it. For example,
jos3_ can be used. Just don't forget to put the underscore character(_) at the end of the prefix.
- Old Database Process: Should the installer backup or delete existing tables during the installation of new tables? Click, Yes or No to select the choice.
All these choices can be edited on the
Site Global Configuration page, under Server options after the installation is completed. Note, you will break your installation if you change these settings after installation unless you have a complete copy of the current database being used by the Joomla! installation. Common uses would be to update the username and password of the database or to complete a move of an existing installation to a new host with different parameters. When all the information has been filled in, click the
next button to proceed:
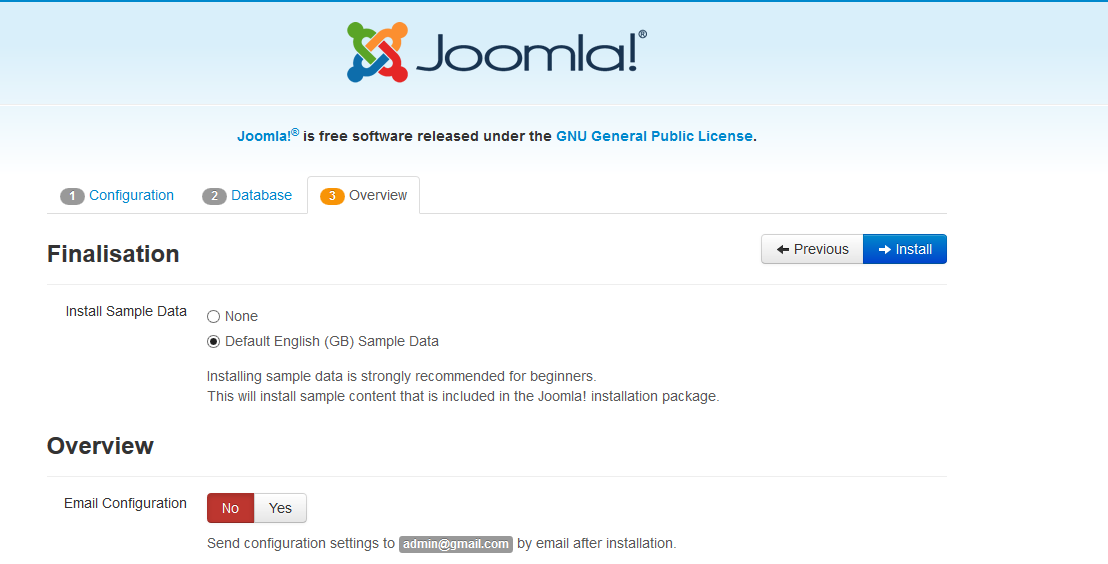
IV. Overview It is now time to finalise the Joomla! installation. The last page of the web brower installation contains all the information about the installation. This includes the options(at the top) for installing sample data and the installation's configurations(at the bottom).
Install Sample Data and Email ConfigurationsThe first options are for automatically installing sample content to the website and emailing the configuration settings.
If you are new to Joomla! it would be benefical to install some
sample data to see how Joomla! works. You can at this time choose to have the configuration settings emailed to you. If the
Email Configuation choice is selected, the
Email Password choice will appear. The email password is off by default for security. You can choose to have the password included, just click Yes.
Time to check the configurations of your install and the environment of the installation.
Checking Your Configuration
If everything is in order, you will see the install at the top of the overview page. If not, this is the place to check and see what may be causing an issue.
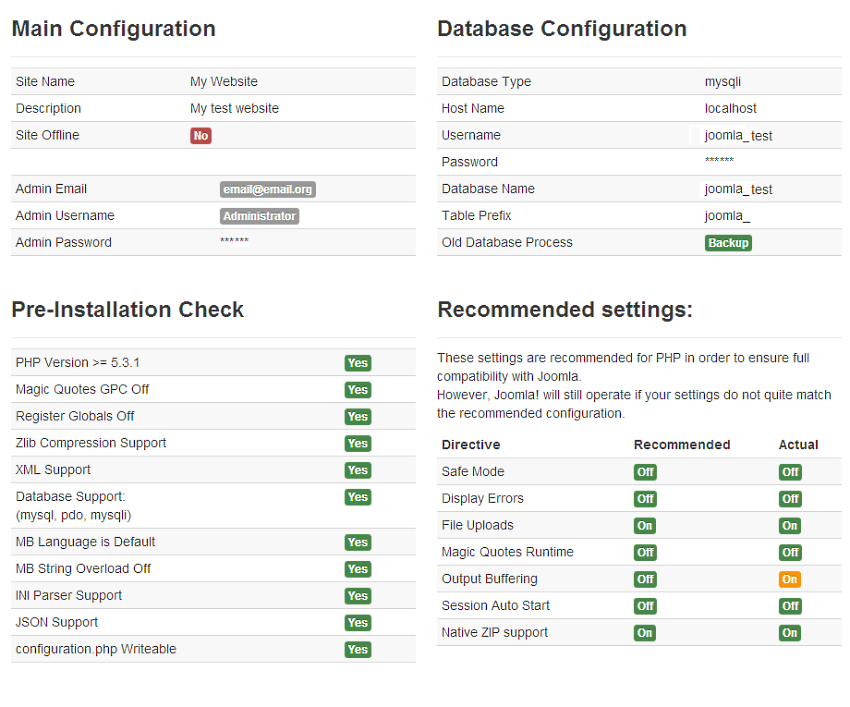
The
section is broken into 4 groups:
- Main Configuration: All the website specific information, such as the website name, description, admin username, etc.
- Database Configuration: Contains the information about the database Joomla! will use.
- Pre-Installation Check: These requirements must all be shown as Yes, otherwise you will not be able to install Joomla! With the exception of the PHP Version, the rest are usually controlled in the php.ini. You may need assistance from your host in correcting these settings or checking to see if it is possible to adjust them. For more information, see PHP configuration file file.
- Recommended Settings: These are settings are recommended in your PHP configuration, but will not prevent Joomla! from being installed. You can refer to the above instructions on how they may be changed.
If everything is correct and all checks are passed, you may now click the
Install button in the top right corner of the
Overview page. This will start the actual installation process. After you click the
Install button, you should see a progress bar with additional information of the installation. Once the installation completes, you should see the success page!
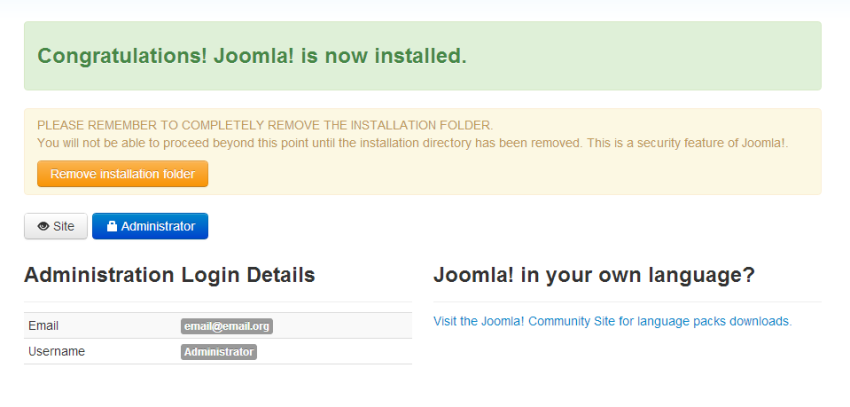
V. Success and Finishing Up the InstallationCongratulations! Joomla! 3 is now installed, but there is one last step to complete the installation and start using your Joomla! powered site. You must delete the
Installation Folder. Click on
Remove Installation folder and a success message will appear. Now you can navigate to the
Administrator log in by clicking
Administrator or go right to your site by clicking
Site.
Install via Admin Panel (packed template file)
Log into the back-end of your site (www.your-site.com/administrator/)
Click on: Extensions -> Install/Uninstall
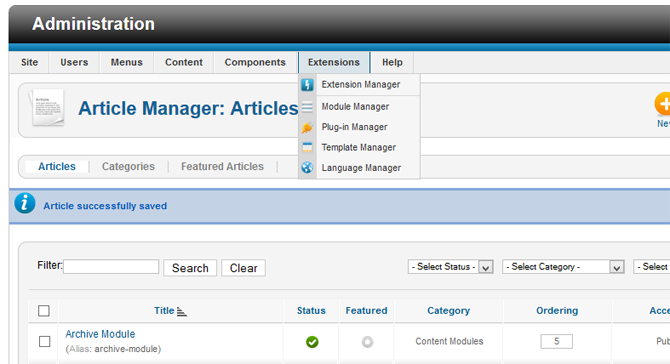
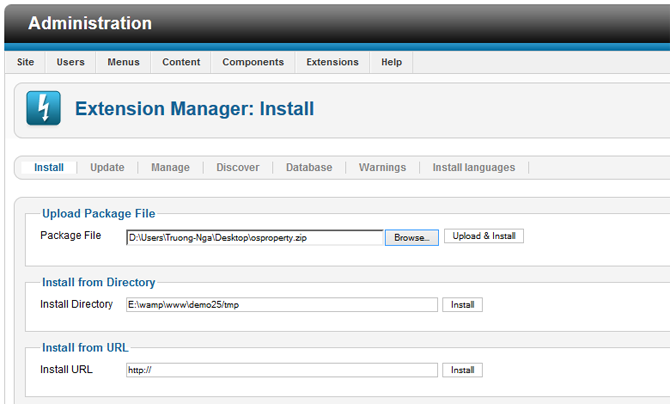
You see the page "Extension Manager"
From here you can install your Templates, Plugins, Modules, Components and Languages. You have three options:
- Upload Package File - (select a package from your PC, upload and install it)
- Install from Directory - (enter the path where the package is located on your server)
- Install from URL - (enter the URL to the package)
Here, we choose the first method: Upload Package File
Select the package from your PC and click the button "Upload File & Install"
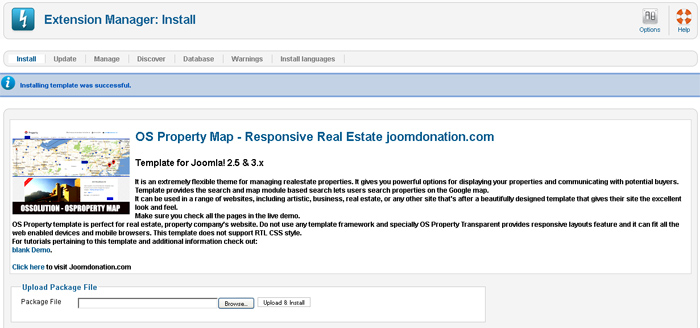
If the package contains no errors you are done and get a success message like the one below.
Install via FTP (unpacked template file)
Templates can also be installed via FTP without packaging them. Simply select the template folder on your PC and upload it to your server, using your favorite FTP software. Be sure you upload the template folder to the directory: /path_to_joomla/templates/ - where /path_to_joomla/ is the location of your Joomla! installation on the server. This method is mostly used when you have created a template yourself, and do not want to have to package it to install the template, or if you want to upload more than one template at once.
Note: Do not try to use FTP to install Components, Modules and Plugins if you are a beginner/novice. These items need database entries which have to be inserted manually if you bypass the package installer.
Install Content From A Template
Joomla Version 2.5 and above can import content along with templates. This is a means to develop content locally with programs like Artisteer so you can import your whole site in one go. To import your content; Install the template as above, then from the Template Manager: Styles page (Extension > Template Manager) Select your template name in the left hand column (with the heading style) and then import content from template.
Template configuration
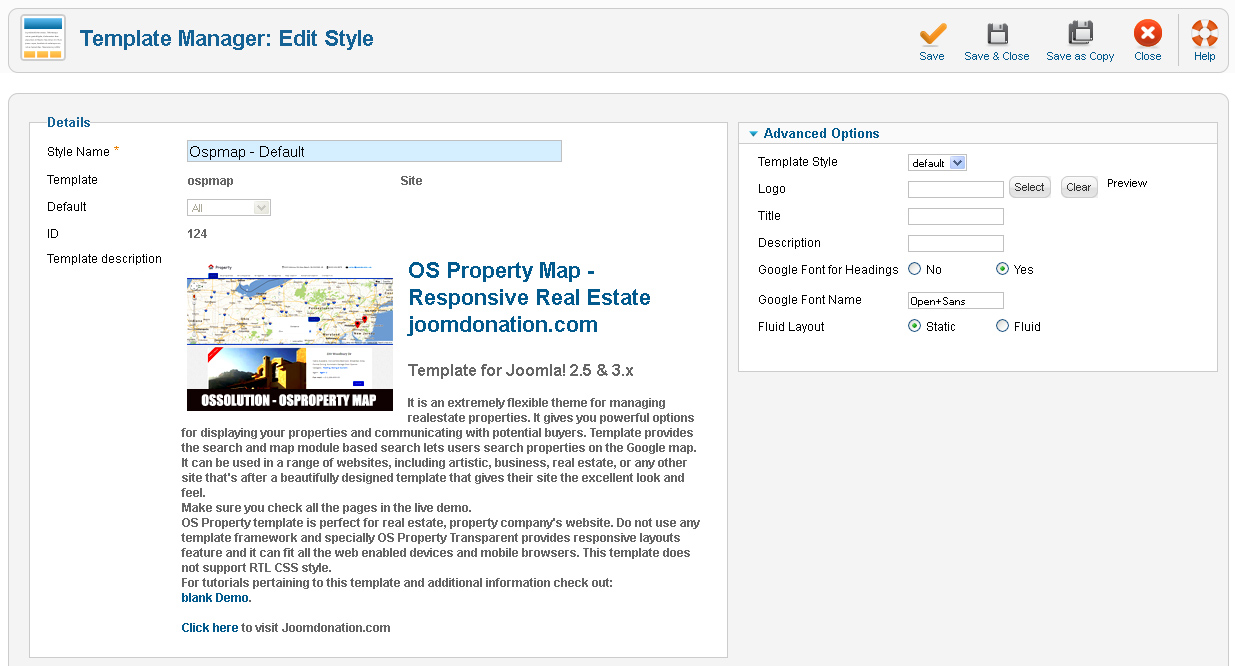
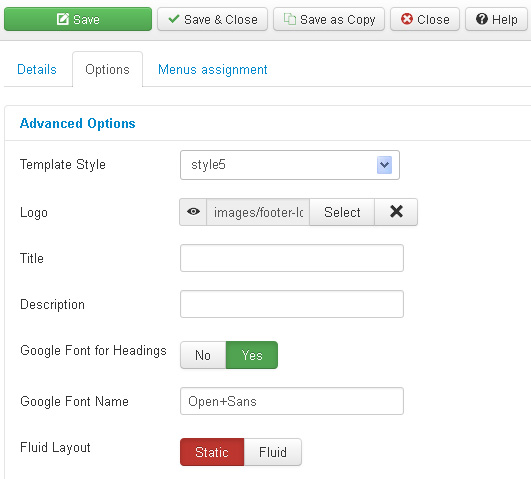
The above picture is the configuration page of template. There are 2 points you need to notice:
1. Template Style
OS Property template has 5 styles with 5 different colours. You can select the suit style with your purpose.
2. Logo
You can select the logo of your site here, it will be shown at the top-right of your template.
Logo
2. Widgets
They are the modules that aren't included in OS Property extension package. You only have it when you purchase template OS Property.
a. Main menu
Main menu is one default module of Joomla, you don't need to install it. But the default style of module in OSP Transparent is urgly, if you want to have the style like above picture, you need to enter value of Menu Class suffix is : nav-pills
Notice: You can do the same for top menu.
b. Map search
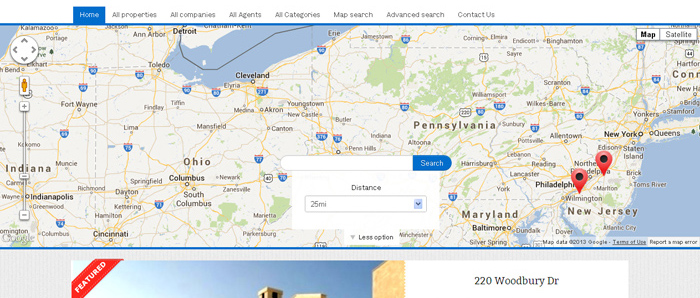
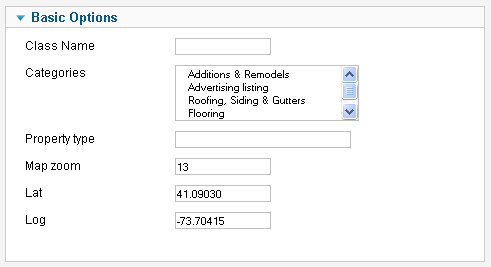
This is module show the map where you can search properties by the location with the radius. You can define the search criteria with the default coordinates of module at the configuration page of module.
At the demo of template, this module is assigned to position : map-search
You can install the module manually, it's mod_ospropertymapsearch.zip
c. Module Slideshow pro
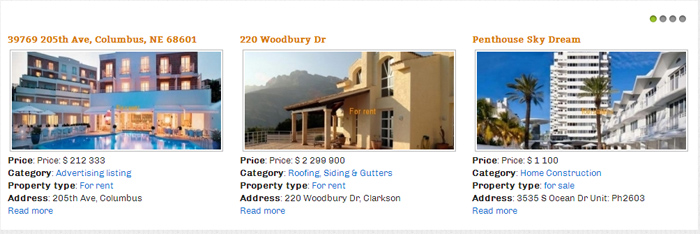
This module show list of properties on slideshow. You can setup the search criteria to find the corresponding properties that you want to show.
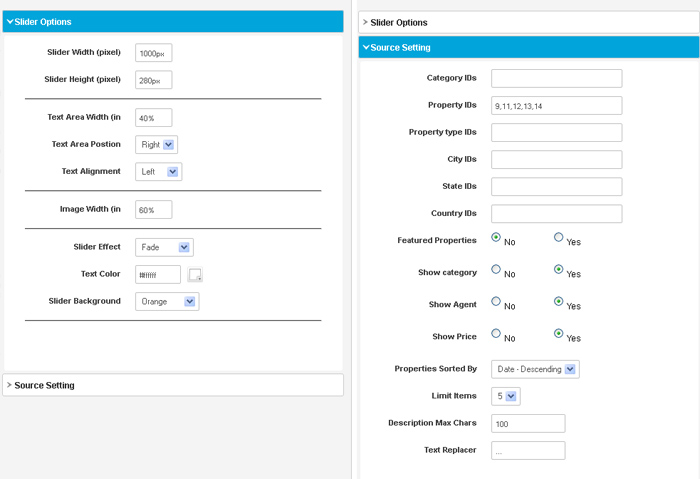
The configuration page of module has 2 parts
1. Slider options
This part allow administrator to manage the layout of the slider at the frontend. If you feel difficult to configure this part, you can copy the left side of above picture
2. Source setting
This part allow administrator to select the search criteria to find the properties to show on the slideshow. You can select categories, enter the IDs number of properties, property types, cities, states, and select to show information on each property.
In the demo of template, this module is assigned to position: slideshow
You can install the module manually, it's mod_ospropertyslideshowpro.zip
d. Featured agents
This module shows featured agents of your OS Property system.
You can define number agents that will be shown and the ordering of agents at frontend of module.
In the demo of template, this module is assigned to position: position-7
You can install the module manually, it's
mod_featuredagents.zip
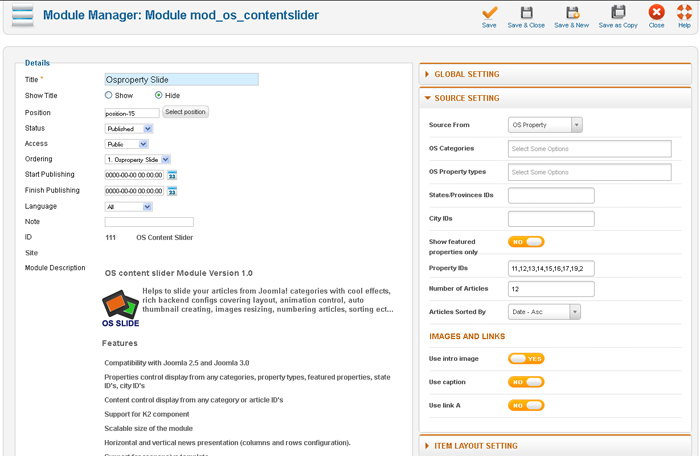
e. OS Content slider
Helps to slide your properties from OS Property component with cool effects, rich backend configs covering layout, animation control, auto thumbnail creating, images resizing, numbering properties, sorting ect...
Features of module:
Compatibility with Joomla 2.5 and Joomla 3.0
Properties control display from any categories, property types, featured properties, state ID's, city ID's
Content control display from any category or article ID's
Support for K2 component
Scalable size of the module
Horizontal and vertical news presentation (columns and rows configuration).
Support for responsive template
Show text, image, author, date, section/category name and button "read more" option, with order customization.
Image Cropping
On/Off front page articles display in modules
Easy and friendly back-end administration.
Used Javascript Framework: Jquery latest version
Fully compatible: Firefox, IE7+, Opera 9.5, Safari, Netscape, Google Chrome, Camino, Flock 0.7+.
In the demo of template, this module is assigned to position: position-15
You can install the module manually, it's
mod_os_contentslider.zip
e. Integrate with K2 component
The quickstart version of template has K2 extension.
List items:
Item details:
f. Social tabs
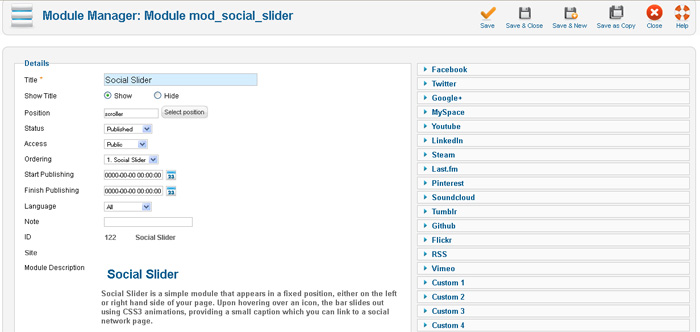
It's module mod_social_slider.zip, once you install it, please assign module to position scroller
At the module parameters form, you can select the social networks that you want to show at the frontend of module.
